If you are curious about how to start with 3D printing at home, you’ve come to the right place! 3D printing is an exciting technology that allows you to create physical objects from digital designs. Whether you’re a hobbyist, artist, or aspiring inventor, 3D printing can open up many creative possibilities. In this article, we will guide you through the process of getting started with 3D printing at home.
1. Choose the Right 3D Printer
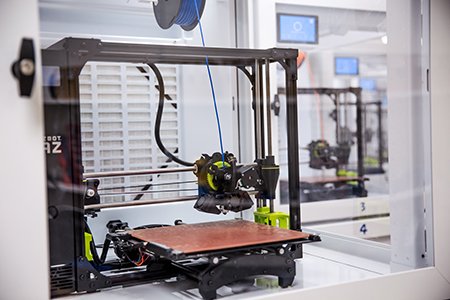
The first step in how to start with 3D printing at home is choosing the right 3D printer. There are many types available, so it’s important to select one that suits your needs. Beginners usually prefer desktop 3D printers, which are affordable and easy to use.
When choosing a printer, pay attention to the following factors:
- Print size: Make sure the printer can handle the size of objects you want to create.
- Print material: Most home 3D printers use filaments such as PLA or ABS. Choose a printer that supports the material you prefer.
- Ease of use: Look for a printer with a simple setup and user-friendly controls, especially if you’re new to 3D printing.
Popular options for beginners include the Creality Ender 3 and Anycubic i3. These are well-reviewed and provide a great introduction to 3D printing.

2. Learn About 3D Printing Software
Once you have your printer, the next step in how to start with 3D printing at home is learning about 3D printing software. This software, called slicing software, takes your 3D design and prepares it for printing.
Some of the most popular slicing software includes:
- Cura: A free program that works with most 3D printers and is beginner-friendly.
- PrusaSlicer: Great for those using Prusa printers, but it can work with other models too.
- Simplify3D: A paid option with more advanced features for experienced users.
These programs allow you to adjust settings like layer height, print speed, and material type to get the best results.
3. Find 3D Models to Print
A key part of how to start with 3D printing at home is finding models to print. You can design your own 3D models using software like Tinkercad, Fusion 360, or Blender, but there are also many websites where you can download free or paid models. Popular websites include:
- Thingiverse: A huge library of free 3D models for a variety of projects.
- MyMiniFactory: Offers both free and paid models, including detailed ones for more advanced prints.
- Cults: Another great place to find unique models, many of which are free.
When you’re starting, it’s easiest to download models and print them directly, but as you become more experienced, you may want to create custom designs.
4. Set Up Your 3D Printer
Before you can print, you’ll need to set up your 3D printer. This part is crucial in how to start with 3D printing at home because proper setup will ensure your prints turn out correctly.
Here are a few key steps:
- Level the print bed: Make sure the bed is perfectly level. An uneven bed can lead to failed prints.
- Load filament: Most 3D printers use filament that melts and is laid down in layers. Choose your filament (PLA is good for beginners) and load it into the printer.
- Check the settings: Adjust the printer’s settings based on your material and the size of the model.
Once everything is set up, it’s time to begin printing!
5. Start Your First Print
Now that you’ve got your 3D printer ready, it’s time to start your first print. In how to start with 3D printing at home, it’s best to start with a simple model. Select a model that doesn’t require complex support structures or very fine details. Something like a keychain, phone stand, or small figurine is a great choice.
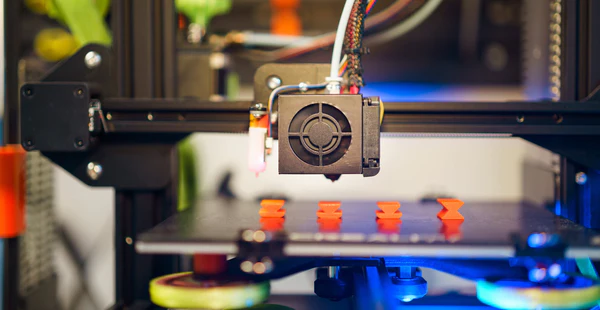
Upload the file to your printer and press start. As the printer works, watch the layers build up one by one. Be patient, as the printing process can take several hours depending on the size and complexity of the object.
6. Troubleshoot and Improve Your Prints
As you begin printing, you may encounter some issues. Don’t worry – this is a normal part of how to start with 3D printing at home. Some common problems include:
- Warping: The edges of your print may lift off the bed.
- Stringing: Thin strands of filament may form between parts of your model.
- Poor adhesion: The model may not stick properly to the print bed.
To solve these issues, try adjusting settings like print speed, temperature, and layer height. You can also use a heated bed or print with a different type of filament to improve results.
7. Post-Processing Your Prints
Once your print is complete, you may need to do some post-processing. This involves cleaning up the model to make it look polished and professional. Some common post-processing tasks include:
- Removing support structures: Most 3D prints need support structures to prevent sagging during printing. You can carefully cut them away with pliers or a craft knife.
- Sanding: Smooth rough edges or imperfections with sandpaper.
- Painting: If you want to add color to your print, you can paint it once the model is clean and dry.
Post-processing can really bring your 3D printed objects to life and make them look more polished.
Conclusion
In conclusion, how to start with 3D printing at home involves several key steps. First, choose the right 3D printer, then learn about slicing software and find models to print. After setting up your printer, start your first print and troubleshoot along the way. Finally, take time to post-process your prints to give them a finished look.
With practice and patience, you’ll be creating amazing 3D prints in no time. Whether you want to create custom designs or just print fun projects, 3D printing offers endless possibilities at home. Enjoy the journey and let your creativity soar!


